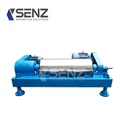
A 2 - Phase Decanter Centrifuge is a critical piece of equipment in various industries, such as wastewater treatment, food processing, and oil and gas. As a supplier of 2 - Phase Decanter Centrifuges, I understand the importance of a proper installation process. In this blog, I'll guide you through the steps of installing a 2 - Phase Decanter Centrifuge to ensure its optimal performance.
Pre - installation Preparations
Site Selection
The first step in installing a 2 - Phase Decanter Centrifuge is to select an appropriate site. The site should be a flat and stable surface that can support the weight of the centrifuge. A concrete floor is often the best choice as it provides excellent stability. It's also essential to ensure that the site has enough space around the centrifuge for maintenance and operation. Leave at least 1 - 2 meters of clearance on all sides of the centrifuge to allow easy access for technicians.
Moreover, the site should be well - ventilated. The centrifuge generates heat during operation, and proper ventilation helps dissipate this heat, preventing overheating and potential damage to the equipment. In addition, the area should be protected from extreme environmental conditions such as excessive moisture, dust, and direct sunlight.
Power Supply
Check the power requirements of the 2 - Phase Decanter Centrifuge. The power supply must match the voltage, frequency, and phase requirements specified in the equipment manual. Ensure that the electrical circuit has proper grounding to prevent electrical hazards. It's advisable to have a dedicated electrical circuit for the centrifuge to avoid power fluctuations caused by other equipment sharing the same circuit.
Water and Drainage
If the centrifuge requires a water supply for cooling or cleaning purposes, make sure that the water source is reliable and meets the quality requirements. The water should be free from impurities that could clog the pipes or damage the centrifuge components. At the same time, an efficient drainage system is necessary to remove the used water. The drainage pipes should be large enough to handle the flow rate and should be properly connected to prevent leaks.
Unloading and Positioning
Unloading
When unloading the 2 - Phase Decanter Centrifuge from the transport vehicle, use appropriate lifting equipment such as cranes or forklifts. Follow the lifting instructions provided by the manufacturer to avoid damage to the centrifuge. Make sure that the lifting points are correctly identified and that the equipment is lifted evenly to prevent tilting or dropping.
Positioning
Carefully position the centrifuge on the pre - selected site. Use a level to ensure that the centrifuge is perfectly horizontal. Any unevenness can cause excessive vibration during operation, which may lead to premature wear and tear of the components and affect the separation efficiency. Once the centrifuge is in the correct position, secure it to the floor using the mounting bolts provided.
Piping and Connection
Inlet and Outlet Piping
Connect the inlet and outlet pipes to the centrifuge according to the piping diagram in the manual. Use high - quality pipes and fittings that are compatible with the materials being processed. Ensure that the pipes are properly sealed to prevent leaks. The inlet pipe should be connected to the feed source, and the outlet pipes should be connected to the appropriate collection or disposal systems.
Instrumentation and Control Wiring
Connect all the instrumentation and control wires to the centrifuge. This includes temperature sensors, pressure gauges, and control cables. Follow the wiring diagram carefully to ensure correct connections. Improper wiring can lead to inaccurate readings and malfunction of the control system. After connecting the wires, secure them to prevent them from being pulled or damaged during operation.
Testing and Commissioning
Initial Inspection
Before starting the centrifuge, conduct a thorough initial inspection. Check all the connections, bolts, and fasteners to ensure they are tightened properly. Inspect the interior of the centrifuge for any foreign objects that may have been left during the installation process. Verify that all the safety guards are in place and functioning correctly.
Dry Run
Perform a dry run of the centrifuge without any feed material. Start the centrifuge at a low speed and gradually increase the speed to the rated speed. Observe the operation of the centrifuge for any abnormal noises, vibrations, or temperature rises. If any issues are detected, stop the centrifuge immediately and troubleshoot the problem.
Wet Run
After a successful dry run, conduct a wet run by introducing a small amount of feed material into the centrifuge. Monitor the separation performance, such as the clarity of the separated liquid and the dryness of the separated solids. Adjust the operating parameters, such as the feed rate, bowl speed, and differential speed, to achieve the optimal separation results.
Maintenance and Support
Once the 2 - Phase Decanter Centrifuge is installed and commissioned, regular maintenance is crucial to ensure its long - term performance. Follow the maintenance schedule provided by the manufacturer, which may include tasks such as lubrication, filter replacement, and component inspection.


As a supplier, we offer a wide range of related products, such as the Two Stage Pusher Centrifuge, Shale Separating Machine, and Solid Liquid Separation Centrifuge. These products can complement your 2 - Phase Decanter Centrifuge and enhance your overall separation process.
If you are interested in purchasing a 2 - Phase Decanter Centrifuge or need more information about installation and maintenance, please feel free to contact us. Our team of experts is ready to assist you with all your needs.
References
- Manufacturer's Installation and Operation Manual for 2 - Phase Decanter Centrifuge
- Industry Standards for Centrifuge Installation and Safety